In this post, I’ll walk you through how to build a simple yet functional web application using five key AWS services: AWS Amplify, AWS Lambda, API Gateway, DynamoDB, and IAM (for permissions). This app takes two numbers, calculates the base to the power of the exponent, displays the result to the user, and stores the calculation in a DynamoDB table.
Project Overview
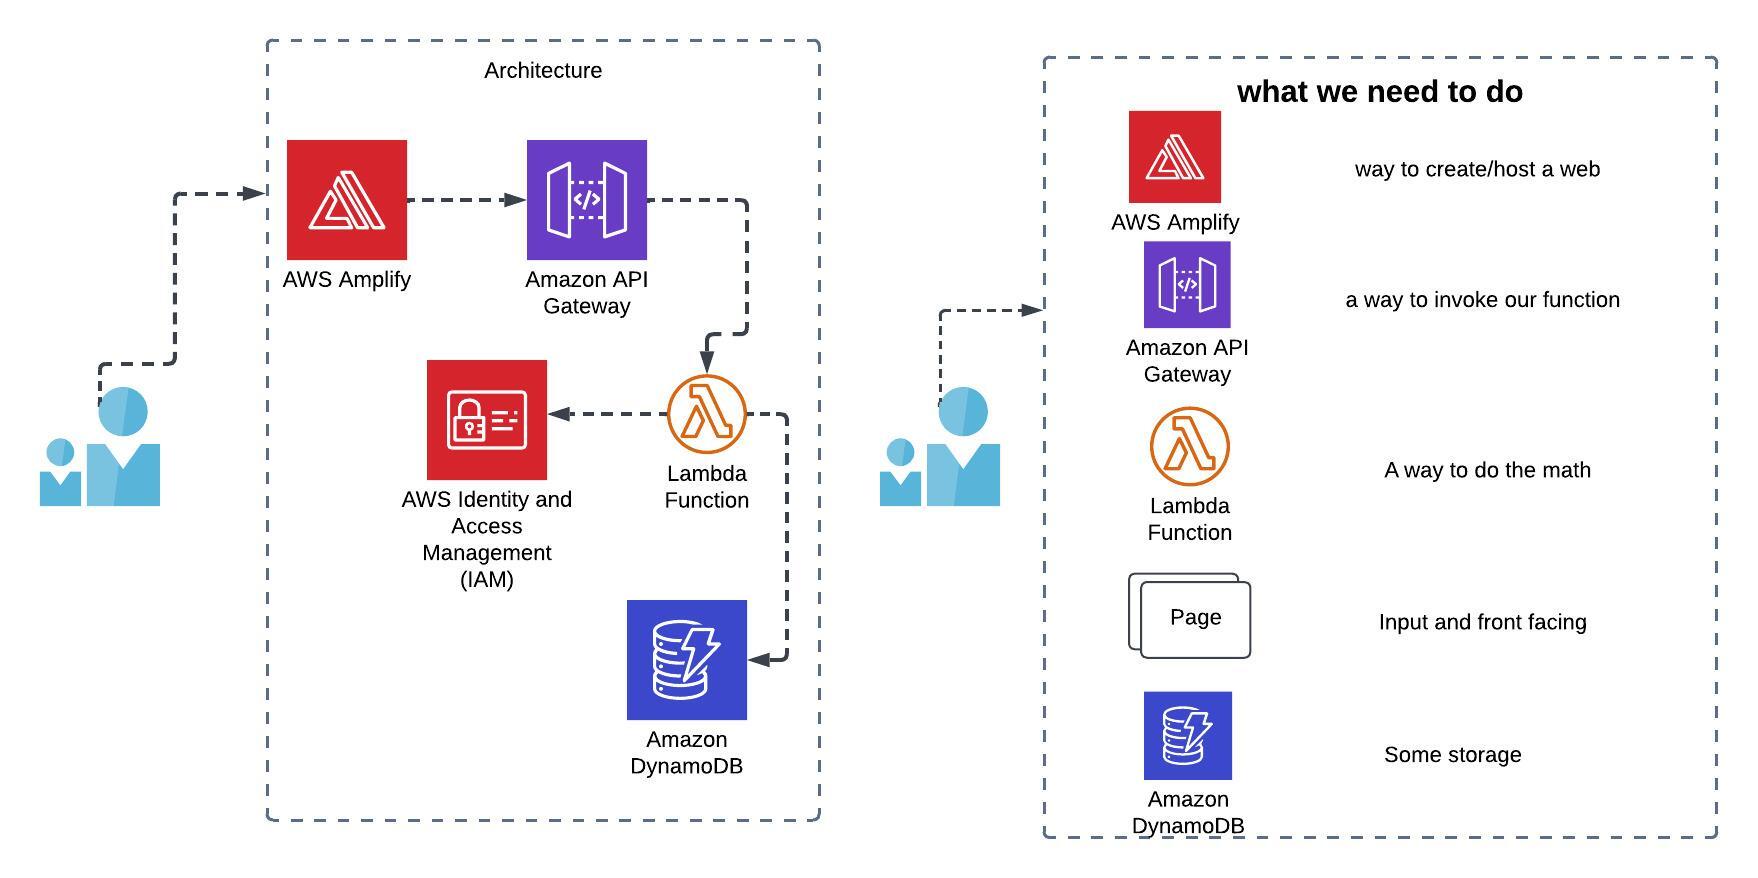
The application consists of the following components:
- Web Page: A simple HTML page where users can enter two numbers and submit them for calculation.
- Lambda Function: A Python function that performs the math calculation and interacts with the database.
- API Gateway: An HTTP endpoint that triggers the Lambda function.
- DynamoDB: A NoSQL database that stores calculation results.
- IAM Roles: Permissions that allow Lambda to write to DynamoDB
Let's dive into the step-by-step guide.
Step-by-Step Guide
Step 1: Hosting the Web Page with AWS Amplify
- Create HTML File: Create a simple
index.htmlfile using a text editor (e.g., Notepad++, VS Code, etc.) This HTML file will have input fields for the base and exponent, along with a button to trigger the calculation. Use the providedindex-original.htmlfor a simple starting point. - Zip File: Zip the
index.htmlfile into a single zip file namedindex.zip. - Navigate to AWS Amplify: In the AWS console, go to Amplify.
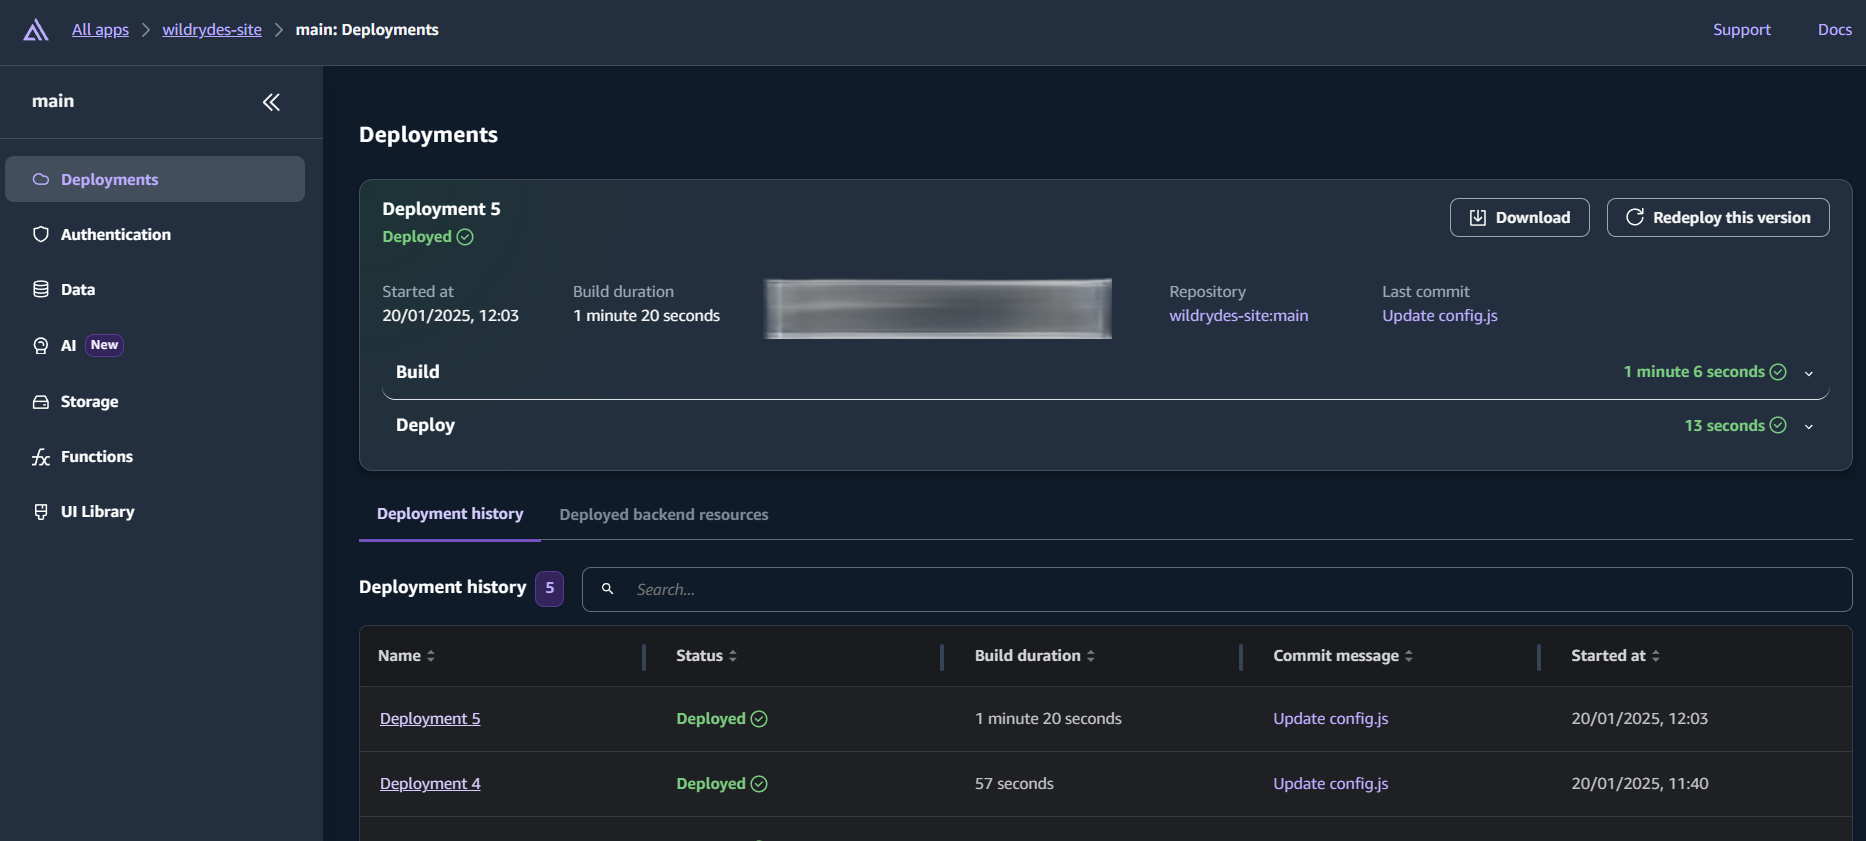
- Create a New App: Create a new application using the "Host web app" option without a Git provider.
- Configure the App: Give the app a name (e.g., "Power of Math"). Use
devfor the environment name and drag and drop the createdindex.zipfile into the designated area, then save and deploy. - Access the Deployed Page: Once the deployment is complete, access the live URL provided by Amplify to view your hosted web page.
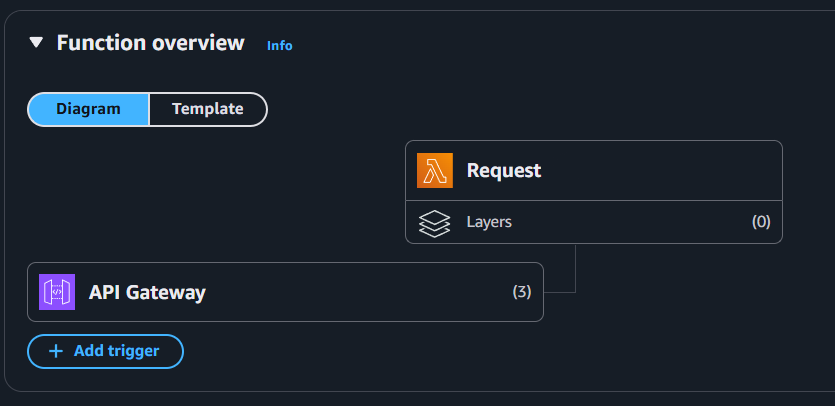
Step 2: Creating the Lambda Function
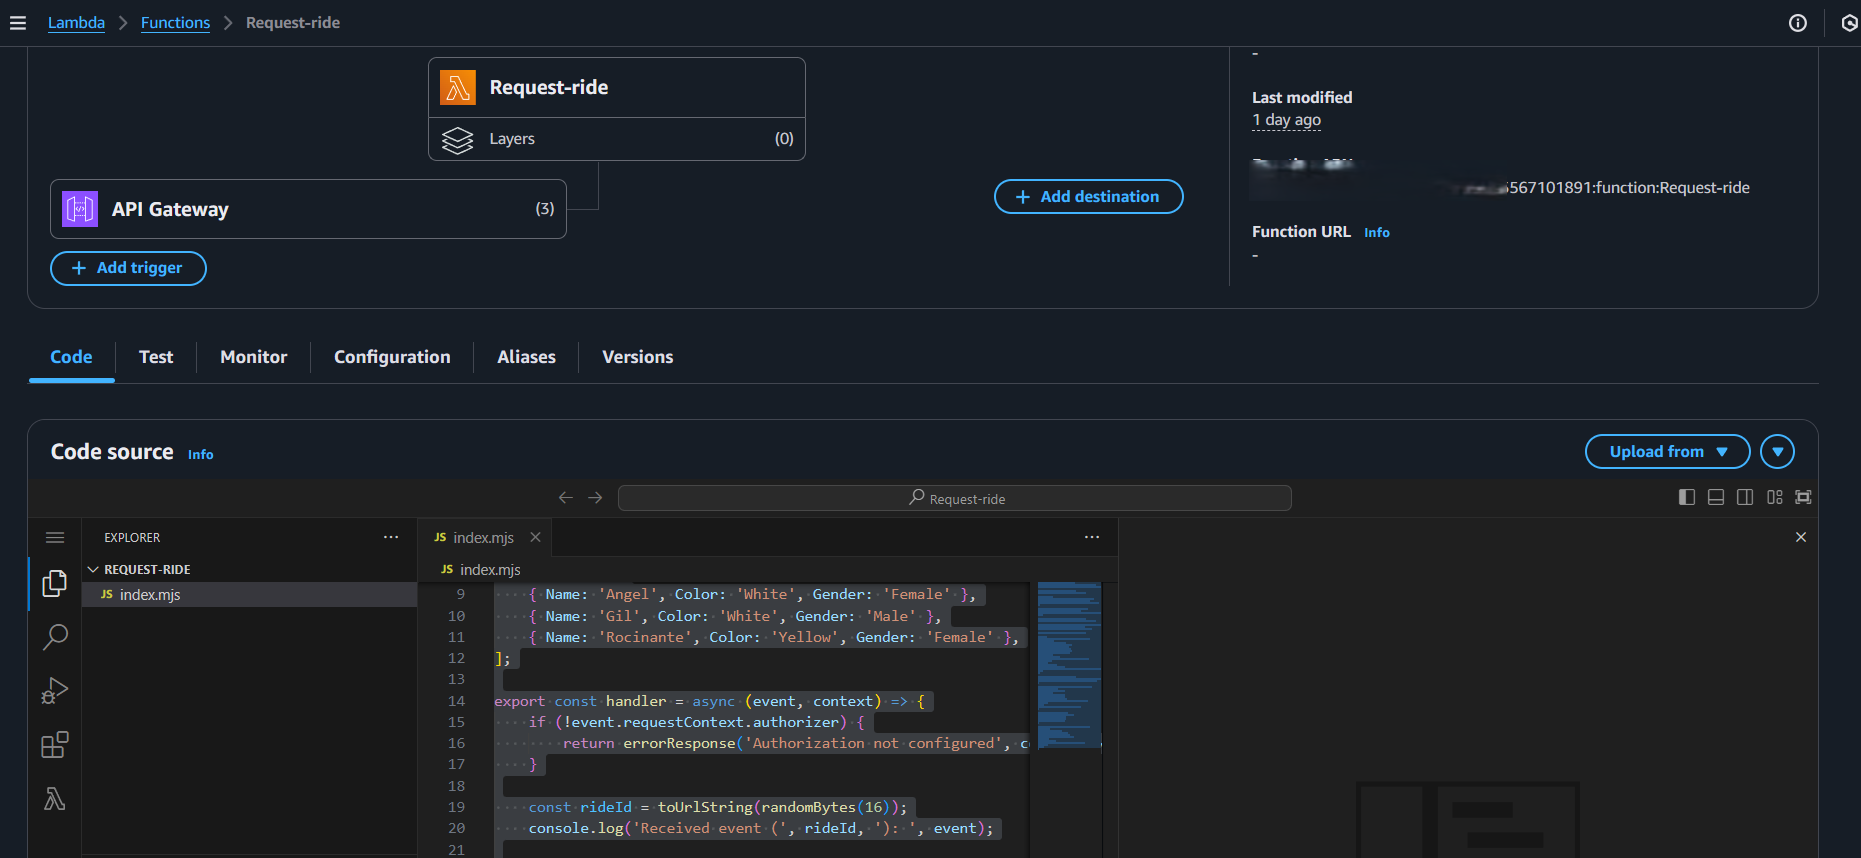
- Navigate to AWS Lambda: In the AWS console, go to Lambda.
- Create New Function: Create a new Lambda function, choose "Author from scratch", give it a name (e.g., "powerOfMathFunction"), and select the desired runtime (e.g., Python 3.9).
- Update Function Code: Replace the default Lambda code with the python code for
lambda-original. - Save and Deploy: Save your code changes and click deploy.
- Configure a Test Event: Click the dropdown next to the test button, and set up a new test event with the json file, you will provide base and exponent numbers to test your code.
- Run the Test: Click "Test" to make sure the function performs calculations correctly.
Step 3: Setting Up API Gateway
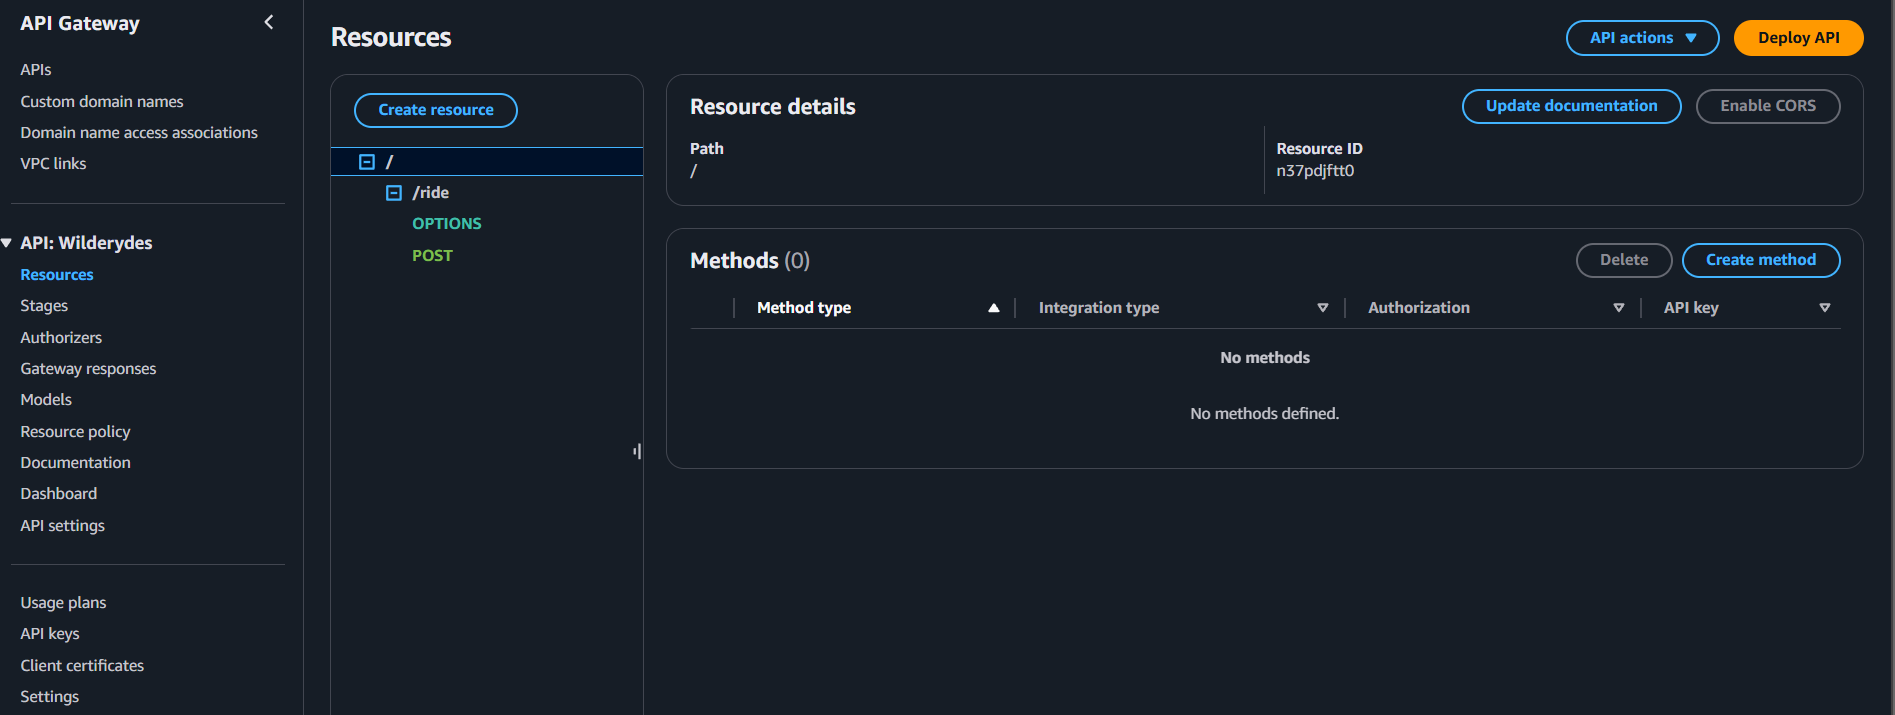
- Navigate to API Gateway: In the AWS console, go to API Gateway.
- Create New API: Create a new REST API. Give it a name, like "powerOfMathAPI".
- Create a POST Method: Select your resource (i.e. the
/), and on actions click to create aPOSTmethod. - Configure Lambda Integration: Configure the method integration type to be a Lambda function, choosing the function you created earlier (e.g., "powerOfMathFunction"). Save and give api gateway the appropriate access.
- Enable CORS: From the action menu on your new
POSTmethod enable CORS. - Deploy API: From actions select "Deploy API" and create a new stage (e.g.,
dev). Note the provided "Invoke URL". - Test the API: From resources, choose your post method, and test your API using the test feature, and provide a json object containing base and exponent numbers.
Step 4: Setting Up DynamoDB
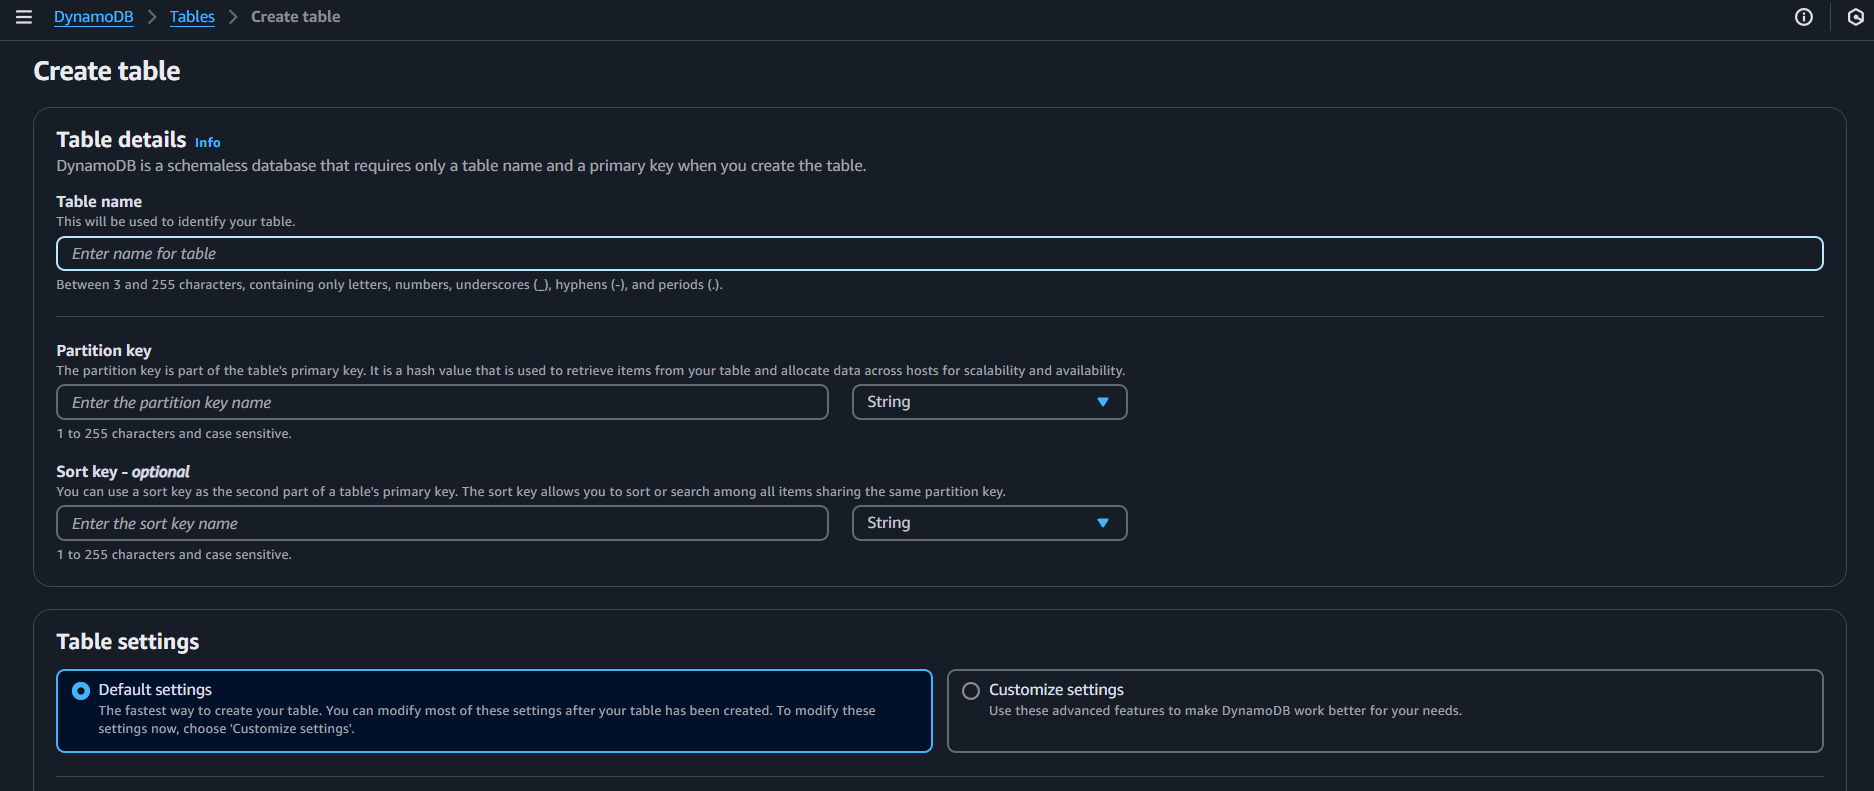
- Navigate to DynamoDB: Go to DynamoDB in the AWS console.
- Create Table: Create a new table, name it (e.g.,
powerOfMathDatabase), and define the partition key asid. - Copy the ARN: Get the table's Amazon Resource Name (ARN) from the "Additional info" section. Save this for later.
Step 5: Configuring Lambda Permissions
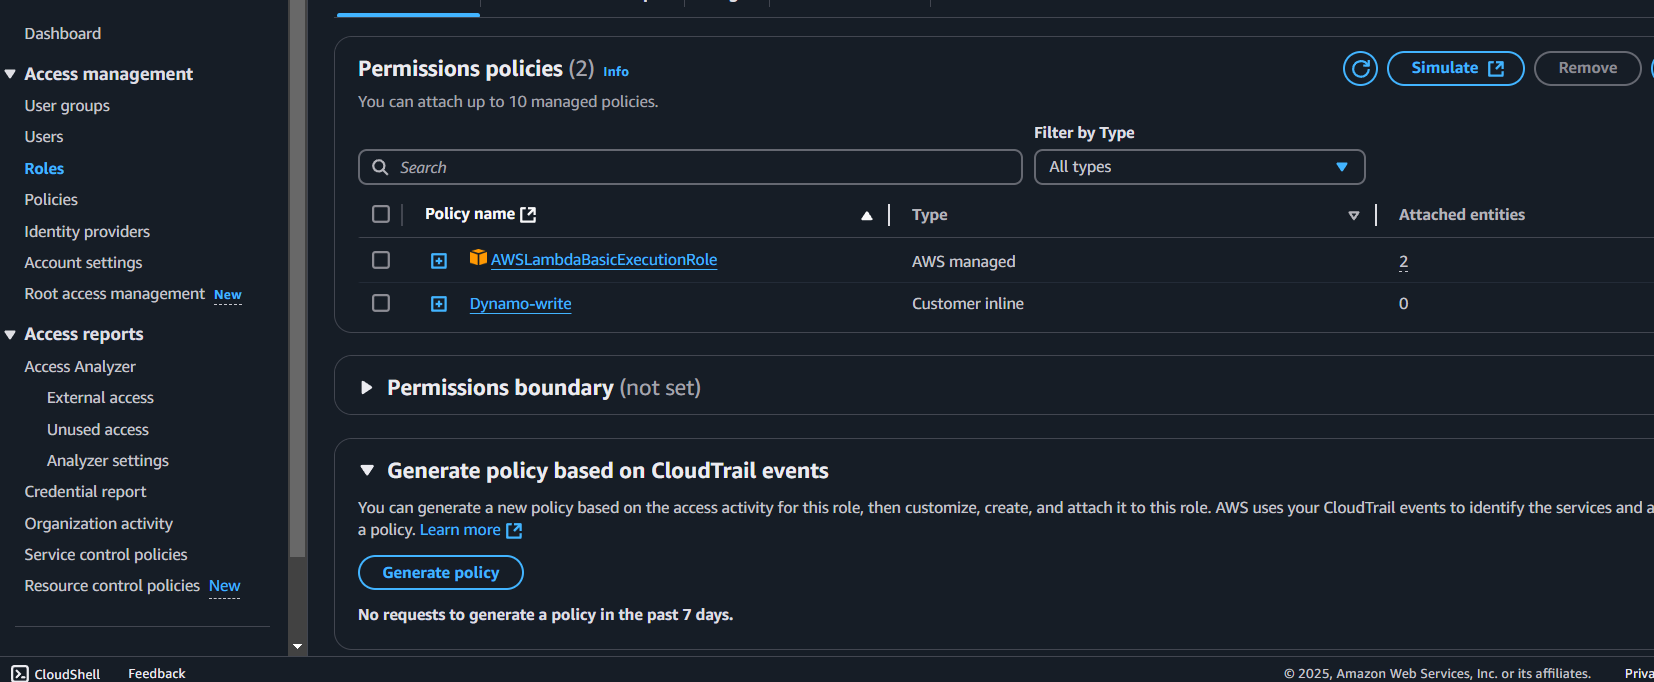
- Navigate to Lambda Function: Go to your Lambda function in the AWS Console and click on configuration and then permissions.
- Open the IAM Role: Click on the role name.
- Add Inline Policy: Add a new inline policy with the json code, make sure you update the policy with your dynamodb arn.
- Name and Save the Policy: Give the policy a name and then create the policy.
Step 6: Update the Lambda Function to Write to DynamoDB
- Update the Lambda Code: Paste the
lambda-final.pycode in your lambda code and update the table name. - Save and Deploy: Save changes and re-deploy your updated function.
- Test the Lambda Function: Test the function again, and confirm that new results are being added to your dynamo db table.
Step 7: Connect the Web Page to API Gateway
- Update index.html File: Paste the code for the final
index.htmlto yourindex.htmlfile, this code will contain the form to get user input, and javascript code to connect the api gateway endpoint to your web application, you need to update the api gateway url within this code. - Create zip file: Create a zip file containing your new
index.html. - Deploy to Amplify: redeploy your application using amplify, drag and drop the new zip file and amplify will redeploy.
- Access the Web App: Access your application and enter a base and exponent, check that your result is being sent from Lambda and is being saved to your dynamodb table.
Step 8: Clean Up Resources

- Delete Amplify App: Delete your app in Amplify.
- Delete DynamoDB Table: Delete your dynamodb table.
- Delete Lambda Function: Delete your lambda function.
- Delete API Gateway: Delete your api gateway api.
Conclusion
Congratulations, you've built a complete serverless calculator application using a multitude of AWS services. This demonstration highlights how you can combine different components to build scalable applications on AWS.