Hello everyone! In this blog post, I'm going to walk you through building a complete web application from scratch using various AWS services. We'll be creating a ride-sharing app – a bit like Uber or Lyft, This is a fantastic project to gain experience with cloud technologies and understand how different services work together.

CLICK the image above for a walk through as i show how you can easily set this up for yourself but i would encourage you to read and try it first before seeing the solution so that you can practice your Troubleshooting skills.
Project Goal:
We’ll build an app called "Wild Rides," where users can register, log in, and request a ride by clicking on a map. The application will then dispatch a ride (from a predefined fleet) and record the request.
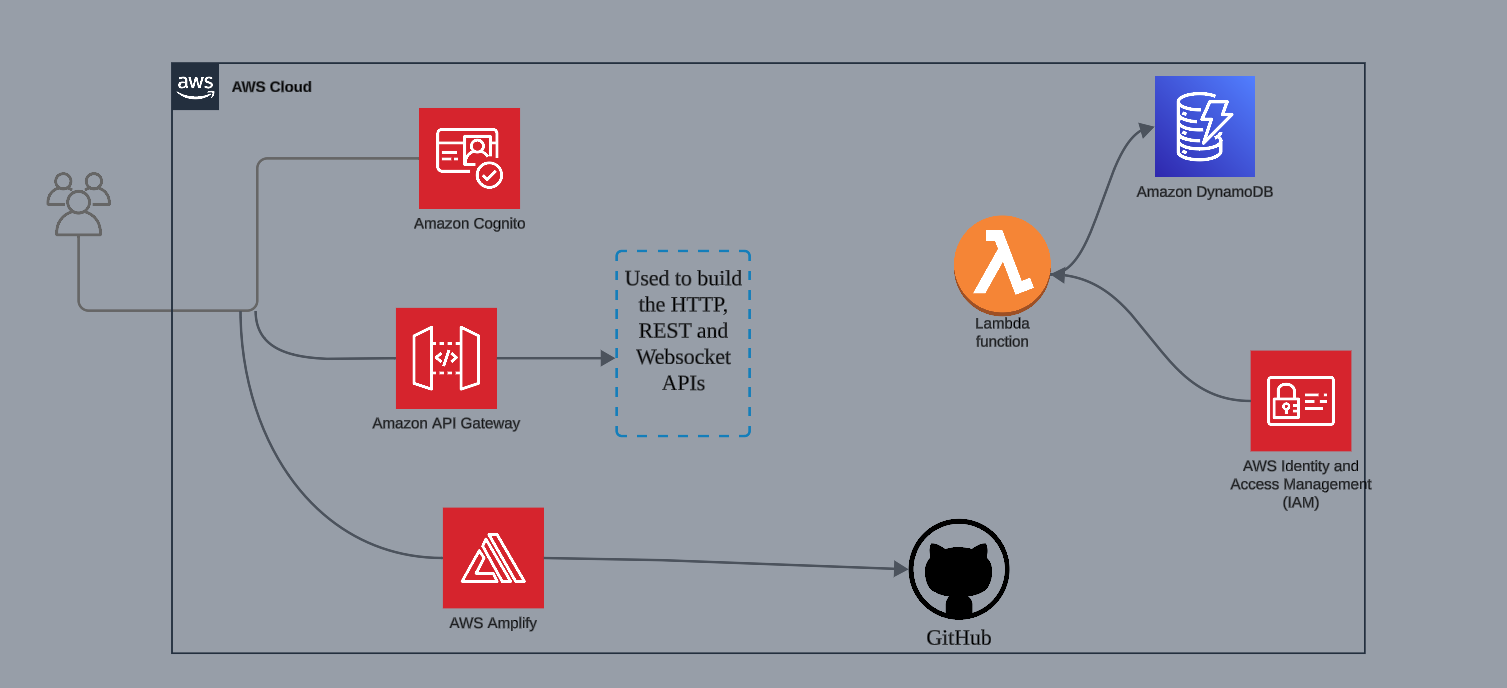
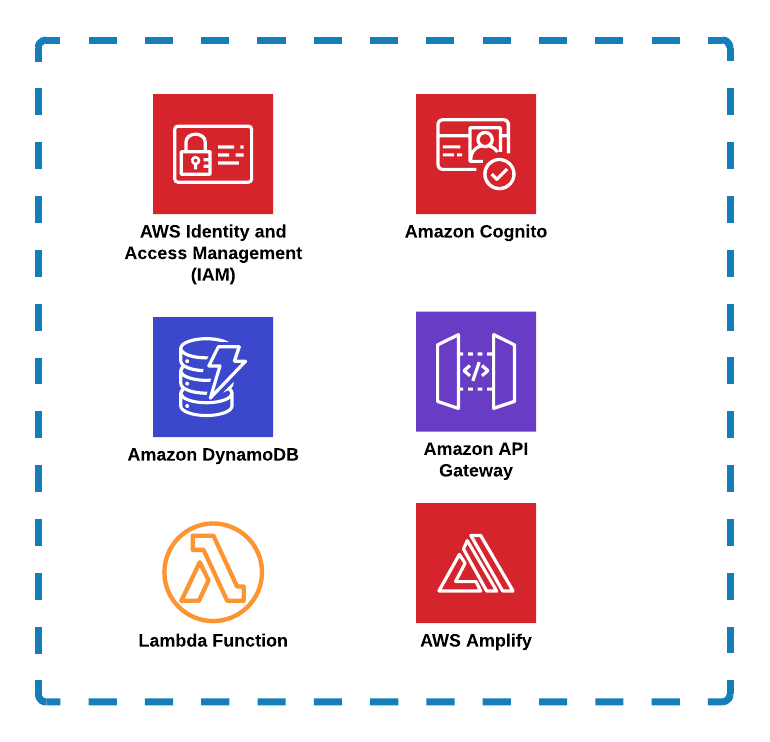
AWS Services We'll Be Using:
- GitHub: For source code version control and storage.
- AWS Amplify: To host our web application and implement CI/CD.
- Amazon Cognito: For secure user authentication and management.
- AWS Lambda: To create a serverless function that handles ride requests.
- Amazon DynamoDB: To store ride request and driver assignment data.
- AWS IAM: To manage access permissions for our services.
- AWS API Gateway: To create an API endpoint that invokes our Lambda function.
- AWS CloudWatch: For function logging and monitoring.
Let’s get started!
Step 1: Setting Up Your Code Repository (GitHub)
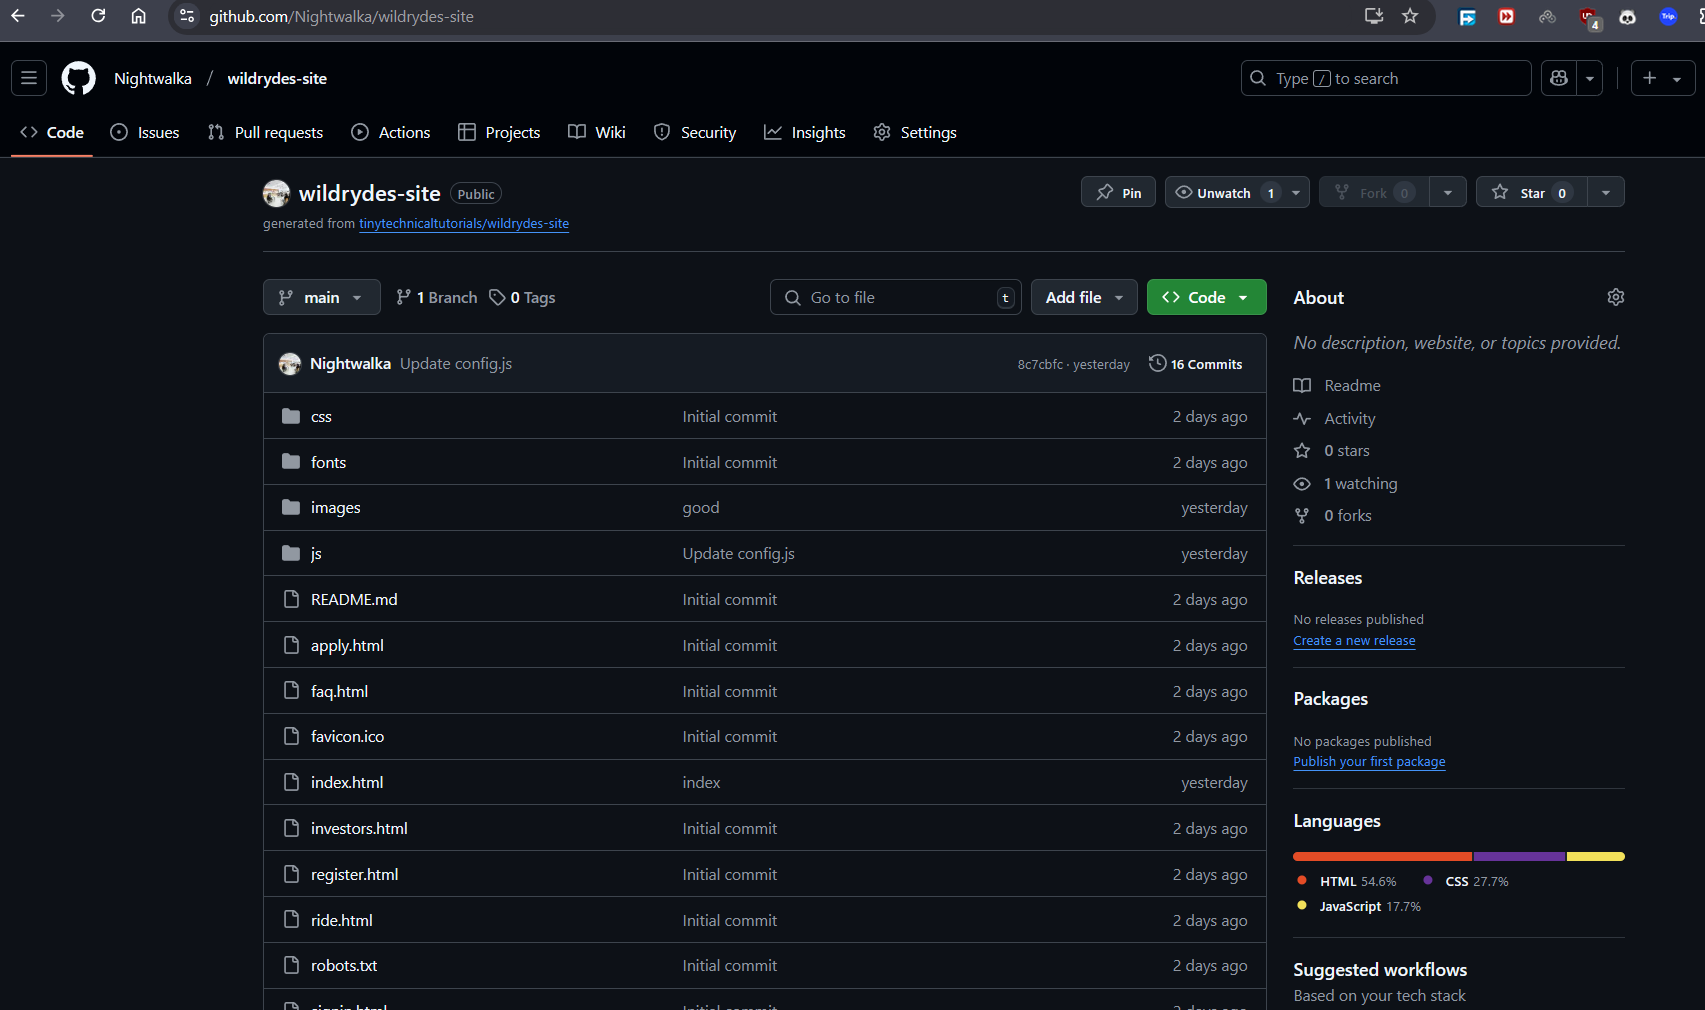
- Grab the Code: I've made the initial application code available in a public GitHub repository as a templat:https://github.com/Nightwalka/wildrydes-site.git
- Create Your Repository: Log into your GitHub account, and use the provided repository as a template to create your own repo. This gives you your personal space to modify and version your code.
Why this is important: Having a repository will ensure source control over our code, and provide a place to revert if we break something.
Step 2: Hosting Your Website with AWS Amplify
- Connect GitHub to Amplify: In the AWS Console, navigate to Amplify and choose to create a new app based on Git provider. You will log in with your GitHub account to grant Amplify access to your repository.
- Select Your Repository: Choose the "Wild Rides" repository that you just created as your source code.
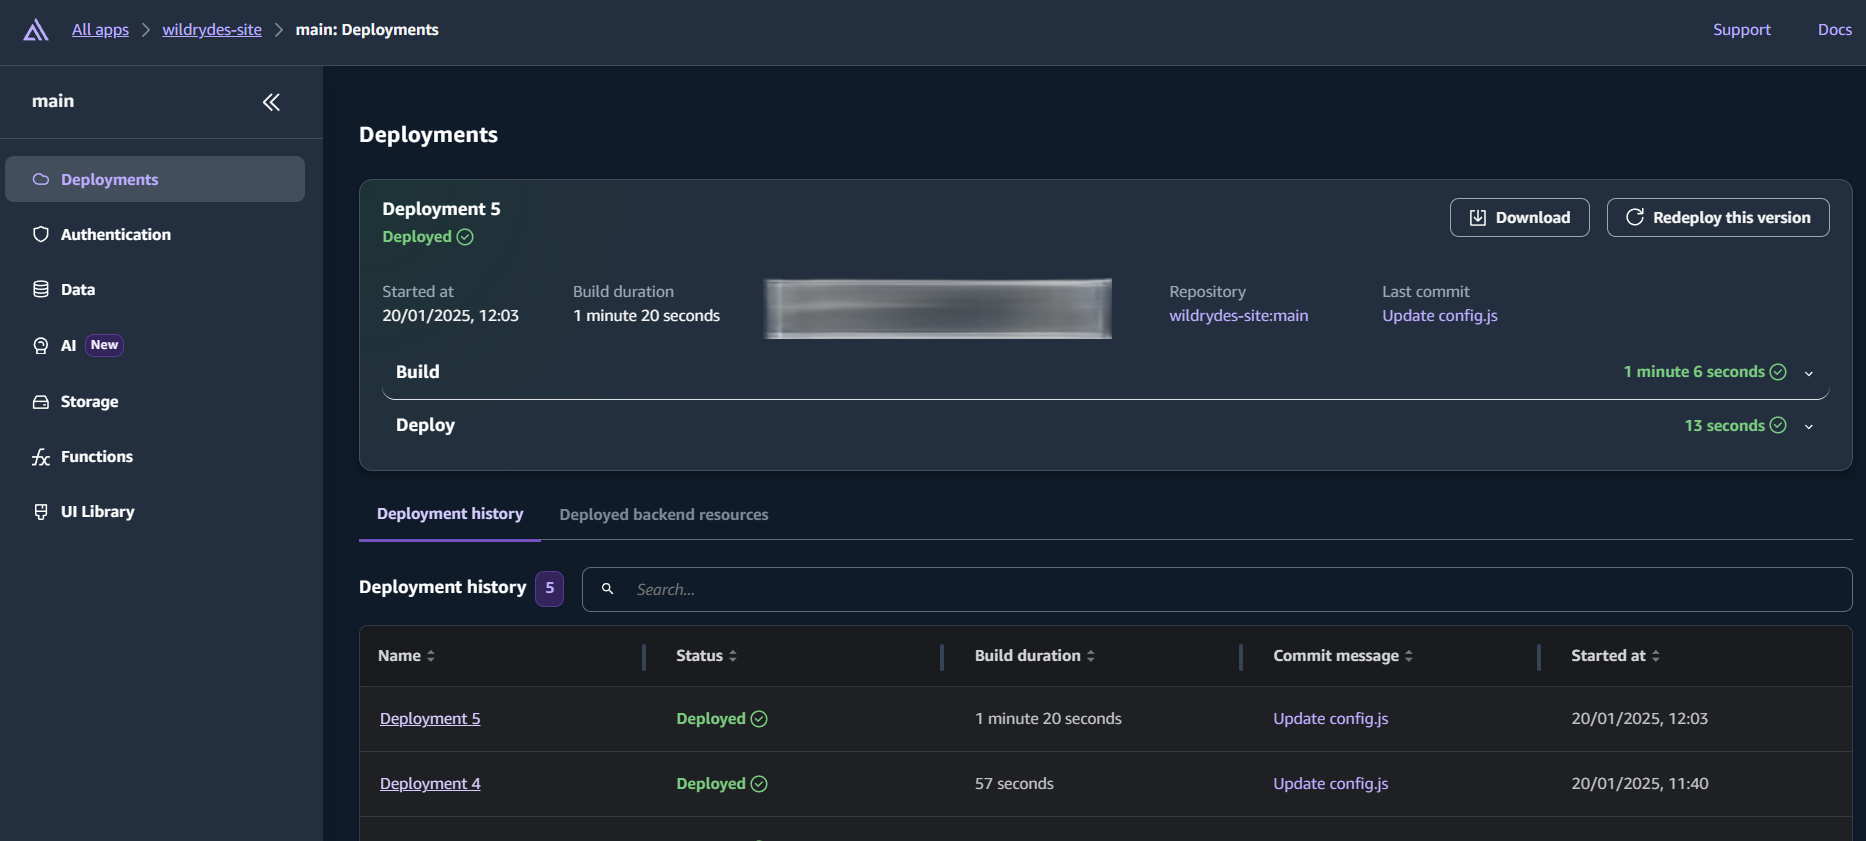
- Deploy: Amplify will automatically start to build and deploy your application based on the configuration it detects in your repository.
- Test Your Deployment: Once deployment is complete, visit the website's URL provided in Amplify to confirm that you have a working web site.
- Test Your CI/CD: Make a small text change to a file, and commit it to your github repository. You will see that Amplify automatically starts to redeploy your updated application.
Why this is important: AWS Amplify makes it very easy to host your site and automatically deploy updates, so that we don't need to manually upload files or have to manage servers.
Step 3: Setting Up User Authentication (Amazon Cognito)
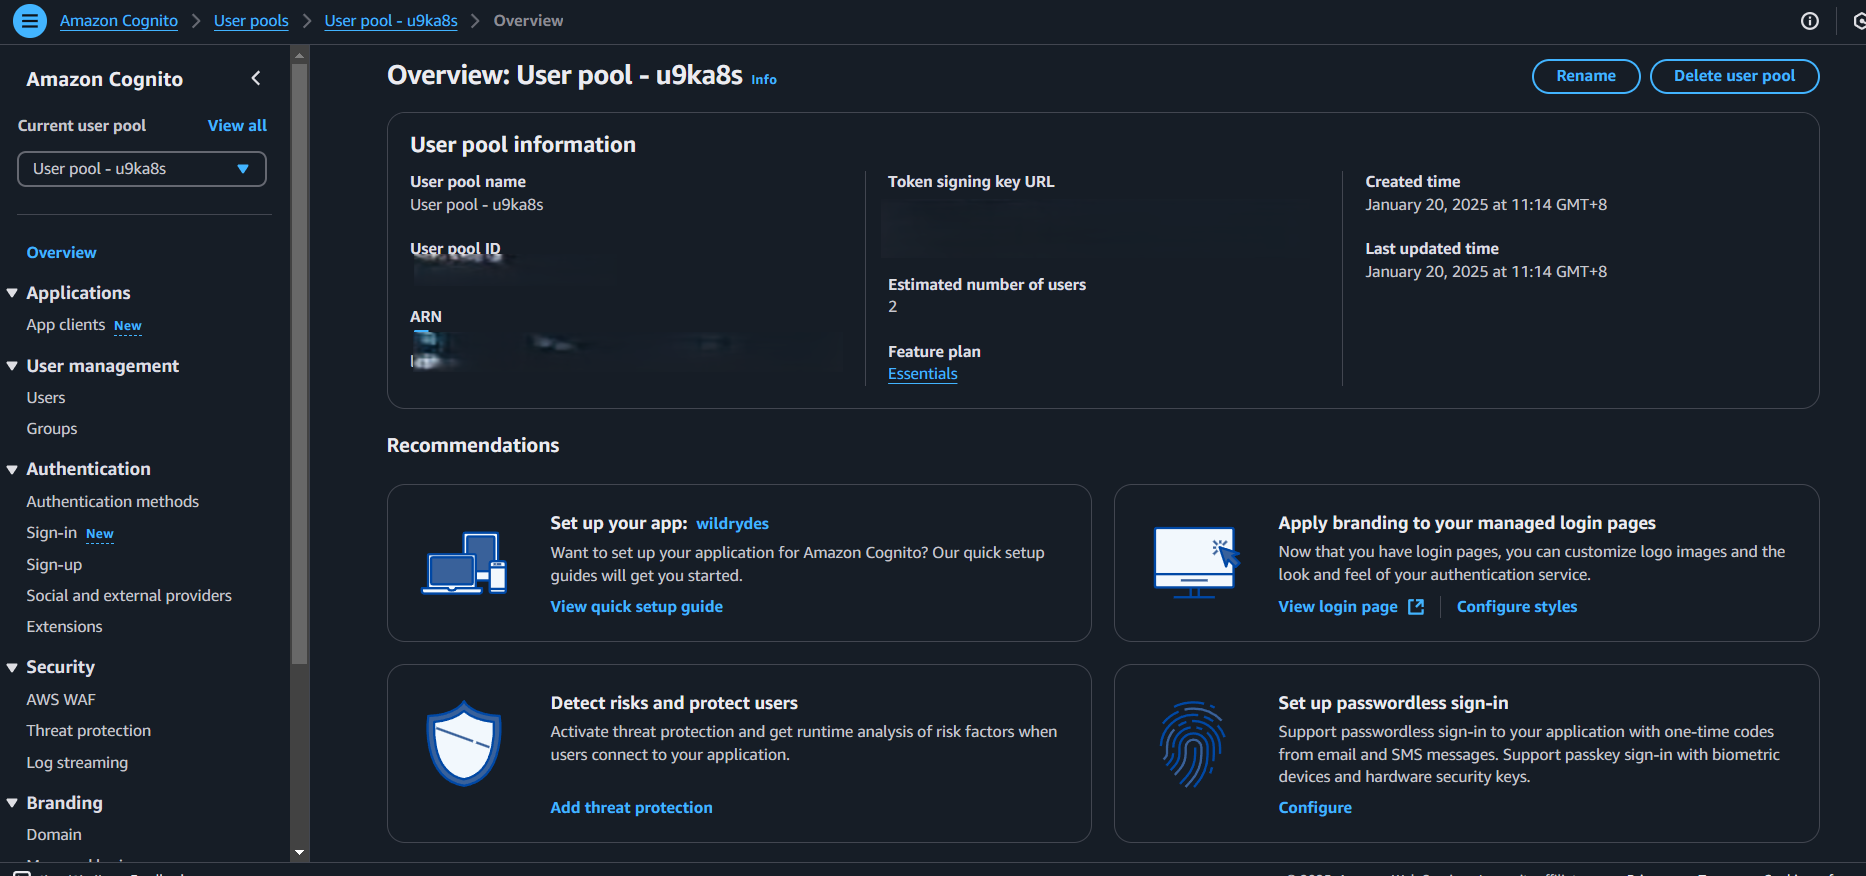
- Create a User Pool: In the AWS console, navigate to Cognito and create a user pool.
- Configure your User Pool: Choose Username as the sign-in option, set password policies, disable MFA, enable email verification with Cognito (not SES).
- Note User Pool IDs: After creating your pool, take note of the User Pool ID and the App Client ID. You'll need these values in the next step. Save them somewhere (notepad or a text file).
- Update Application Configuration: Open up the `config.js` file from the github repository and paste in your User Pool ID and Client ID that you noted. Update the region in the `config.js` file as well. Commit your changes.
- Test Registration and Login: Navigate to the site, where you can click on "Giddy Up" to register for a new account, or sign in to an existing one. Register using a valid email and a password. Check your email for the confirmation code and paste that into the form to confirm your registration. After successfully logging in, you should see an access token, which you should copy for later.
Why this is important: Cognito handles all the registration and login features, keeping our application secure.
Step 4: Creating the Ride-Sharing Functionality (Lambda and DynamoDB)
- Create the DynamoDB Table: In the AWS console, navigate to DynamoDB and create a table called "rides" (or "rides2024") with a primary key called `rideID` of type string. Copy the ARN of the table, and save for later.
- Create the IAM Role: Create an IAM role for Lambda, using AWS Lambda as the trusted entity. Include the `AWSLambdaBasicExecutionRole` policy. Then add an inline policy that gives permission to write an item to the DynamoDB table. Use the ARN you copied earlier, to specify a specific table.
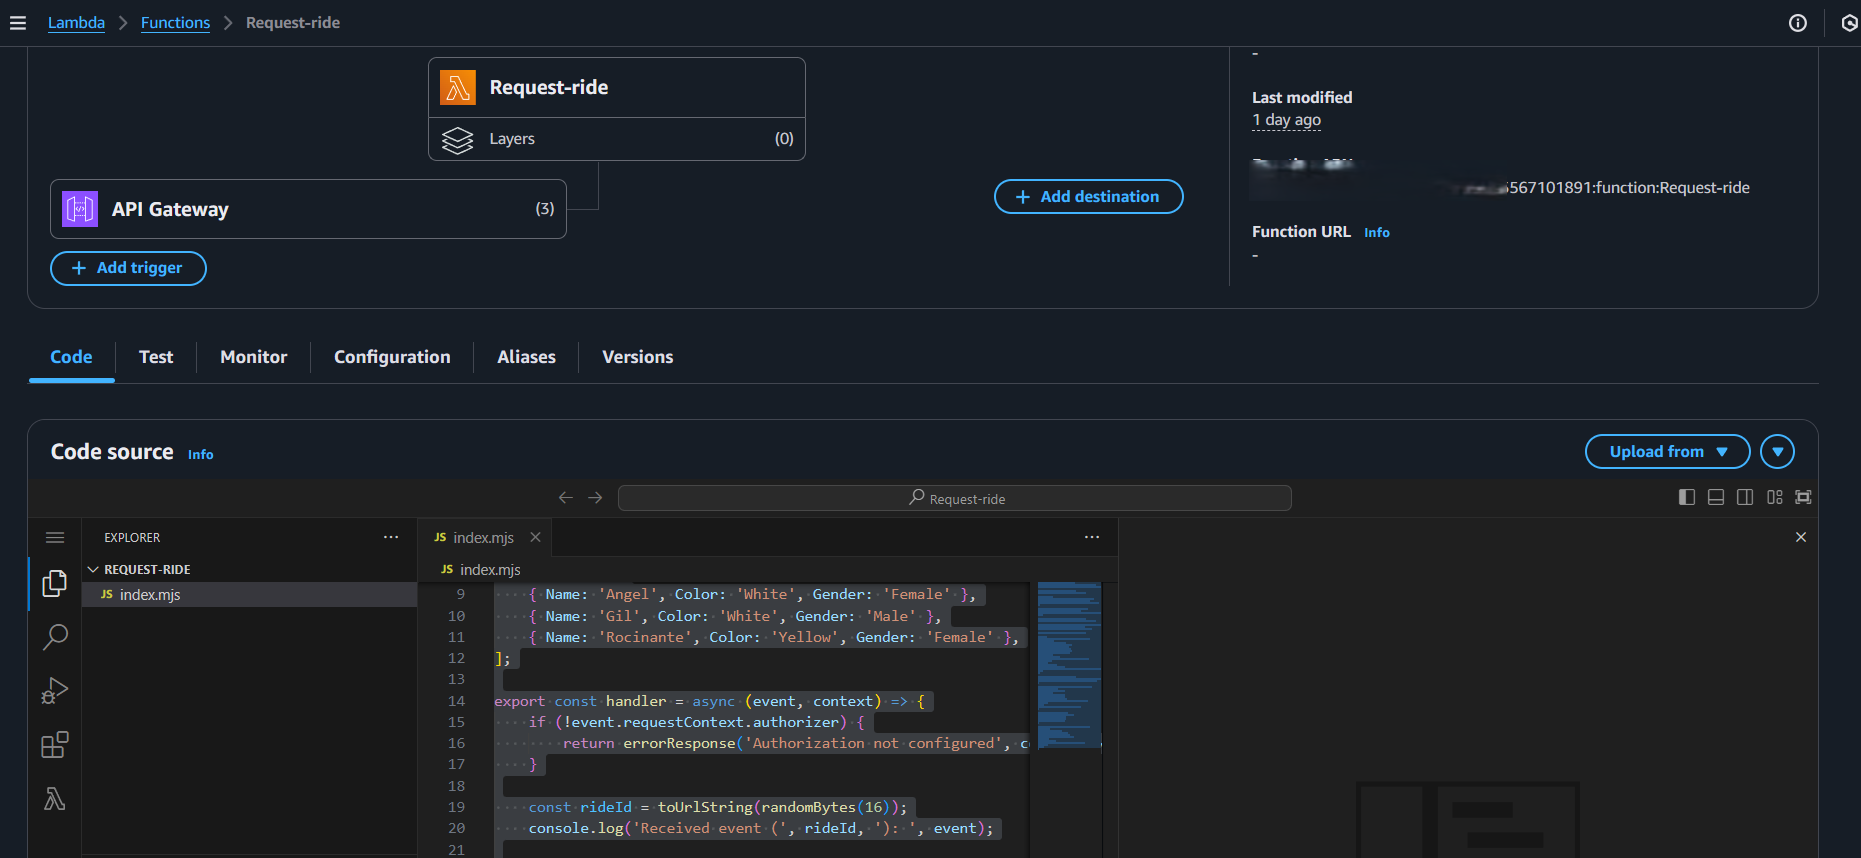
- Create the Lambda Function: Create a new Lambda function called “request ride" with a Node.js runtime. Make sure you configure the function to use the IAM role you created.
- Paste Lambda Code: Copy the Lambda function code from the provided file in the GitHub repository and replace the sample code in the Lambda function with it. Make sure you update the code with the correct DynamoDB table name if you changed the default from "rides" to something else (like "rides2024"). Also make sure the runtime is nodejs20.x or newer.
- Test the Lambda Function: In the Lambda console, create a new test event with the provided test JSON. Make sure that the Lambda test execution returns a status code of 201. You can also confirm that an entry was written to the DynamoDB table.
Why this is important: Lambda and DynamoDB work together to handle the backend logic and data storage, and ensures that we can run code without having to manage any servers.
Step 5: Connecting Everything with API Gateway

- Create the API Gateway: In the AWS Console, navigate to API Gateway and create a new REST API called “wild rides” or similar.
- Create a Cognito Authorizer: In API Gateway, create a Cognito authorizer, and point it to the Cognito user pool you configured earlier. The token source should be “Authorization”. Test the authorizer using the token from the previous step.
- Create a resource: Create a resource called `/ride`.
- Configure the POST method: Configure the `/ride` resource with a POST method to use the Lambda proxy integration type to connect with the “request ride” Lambda function that you created in the previous step.
- Set the Authorizer: In the method request, you should set the authorizer to be the Cognito Authorizer you just set up.
- Deploy the API: Deploy the API to the "Dev" stage and copy the invoke URL that is shown in the API console.
- Update Application Configuration: Go back to the `config.js` file from the github repo and replace the placeholder invoke URL with the one from API Gateway. Commit your changes.
- Test End-to-End: Load `slide.html` in the browser, and click on the map. You should receive the driver information in the browser. You can also confirm that a record was written to the DynamoDB table.
Why this is important: API Gateway exposes the Lambda function as a secure HTTP endpoint, making it accessible to our frontend application.
Step 6: Cleaning Up
- Delete all the resources you created: Follow the steps described in the video to delete all the resources that you created during this tutorial: Amplify app, Cognito user pool, Lambda function, IAM role, DynamoDB table, API Gateway API, GitHub repo, and Cloudwatch logs.
- Double check: Revisit the services that you've touched to make sure you have deleted all the resources.
Why this is important: This step helps avoid any unnecessary charges from AWS after finishing the tutorial.
Key Takeaways:
- We've seen a full, real-world example of how different AWS services can work together.
- We've built a scalable, serverless web application.
- You have hands-on experience with many core AWS services.
I hope this tutorial has been helpful! If you have any questions or feedback, don't hesitate to ask. Happy coding!